Thanksgiving Headbands | Kids Craft
This shop has been compensated by Collective Bias, Inc. and its advertiser. All opinions are mine alone. #HandsOnCrafty #CollectiveBias

Now that October is over, I am starting to look forward to Thanksgiving and Christmas. One of the things I look forward to the most is spending the week of Thanksgiving in Park City with my family. We have had this tradition for almost 20 years and I love sharing it with my children. While we are there, we like to bring projects to do, and holiday projects are definitely a must!

I am usually the one that is put in charge of figuring out a project or two for all of the kids, and I really love it. This year I thought it would be fun to make some Thanksgiving headbands with them, and I can’t wait to see the way that they decide to make their own headbands.
It is always a good idea to have more than one option, and having one of those options be easier than the other is great when you’re working with kids. I went with an Indian headband, and a Pilgrim hat headband design. The supplies for this project are pretty simple, and the best part is you can head to your local Walmart to pick up all of the supplies in one place.

You’ll need:
- Cardstock (brown, red, black, yellow, white, orange)
- Scotch® Expressions Glitter Tape Platinum and Orange
- Scotch® Create Double-sided Tape
- Scotch® Create Glue Pen
- Stapler
- Scissors

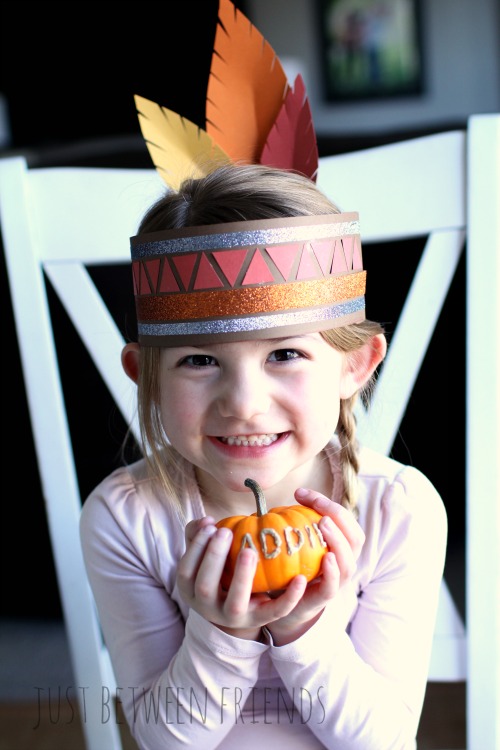
Start by cutting out the strips for the headbands. Mine are the full length of the cardstock (12 inches), and 2.5 inches wide and you will need two of them per headband. I grabbed my two colors of the Scotch® Expressions Glitter Tape and cut the platinum glitter tape the length of the headband, and then cut it in half lengthwise. Then I used the orange tape to create another stripe on the headband. In the remaining space, I grabbed the red cardstock and cut a strip of paper that is the width of the space between the glitter tape. Then I cut that strip into little triangles and attached using the Scotch® Create Glue Pen. You could also make it easier and cleaner while working with kids by using a 3M glue stick.

Once you have the pattern completed on the front of the headband, you’ll grab the other strip of paper that you cut for the headband and staple it on one side. Measure the strip of paper around the head of whoever is going to wear it, and then staple it on the other side so that it fits really well.

Now for the fun part! You get to cut out some feathers. There’s no right or wrong way to do this. You can make them all the same size and shape, or you can vary the sizes (which is what I decided to do.) After the basic shape is cut, fold the feather in half lengthwise to create a crease. Then you’ll cut some notches on both sides of the feather to make it look more feather-like.

Attach the feathers to the back middle part of the headband using the Scotch® Create Double-sided Tape. It makes the feathers nice and secure.

It’s such a fun headband, and it was a hit with my daughter! I can’t wait to try it out with my nieces and my other daughter as well.

If you need a simpler version, the pilgrim hat is the perfect solution for you. You’ll cut a trapezoid out of the black paper, and then the brim is a long curved piece that is longer than the trapezoid. You will also cut out two white strips of paper for the headband like you did for the other headband. Last, you’ll need to use the yellow paper to cut out a buckle for the front of the hat. It’s just a square with a smaller square cut out of the middle.

Use the Scotch® Create Double-sided Tape to attach the pieces together, and then you will need to use the stapler to put the strips together.

These are sure to be a hit, so grab your Scotch® Expressions supplies and plan on making these this Thanksgiving! The kids will love them.


