Craft Room Update | Part One
It’s been a while since I posted anything about my craft room, and since a lot has been changing in it, I thought I would show you a craft room update. When I initially posted about my craft room, I showed you one part of my room that I had made so functional and pretty. The sad truth is that I never showed you the rest of the room because it was definitely not functional at. all. A month or two ago, I decided that I had had enough of the random hodge podge that my craft room had become and started over. I am in the middle of getting it all done, but I thought I would share along the way.
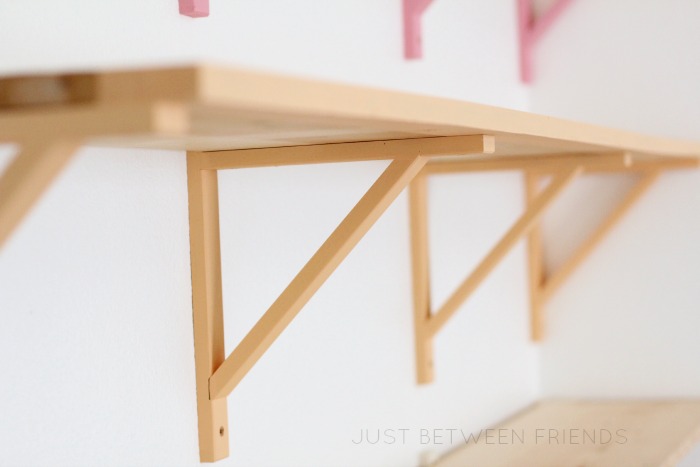
I took out the tall desk because I simply wasn’t using it except to throw random stuff on it. I knew I needed a desk that is normal height and I knew I needed storage. The shelves are 6 feet long, and are exactly the thing that I needed to be functional. As an added bonus, I think they are pretty too! Just wait until you see all the pretty things that I have on there to hide the not so pretty things. 🙂
I bought the brackets from IKEA. They came in a natural wood, but I wanted to add some color to my space. I painted them in some fun colors and hung them up. The wood for the shelves came from Home Depot. They are simply 1X12X6 pieces of pine! Don’t they look so great?!
Here is a tip for buying any sort of 1 by pine pieces of wood. They tend to warp easily since it is inexpensive wood. You will want to make sure you have the straightest pieces of wood that you can find. The easiest way to check it out is to take it off the shelf and lay it on the floor at the store. If there is any sort of flex in the wood or it doesn’t lay flat, put it back and keep going until you find the best piece you can. I always make sure to turn it over on each side to check it thoroughly.
I used some painters tape and taped off a 2.5 inch section on the wood and painted it. I liked the idea of having the raw wood showing as well as the color.
Make sure that when you are hanging the brackets that you are screwing them directly into your studs. Once they are in place, put the shelf on top and then screw the shelf in place so that you won’t have a chance of it falling off, and then step back and enjoy the view! It is such an easy and inexpensive way to create a place to organize all the things that you need to organize. I am definitely loving the way that things are looking so far, and have big plans for my entire room that I am so excited to show you. It is really shaping up and looking great!


