DIY Stick Horses | Free Pattern
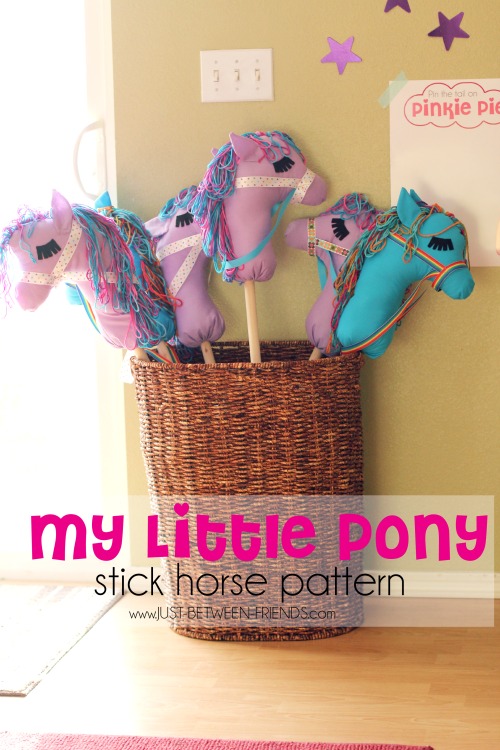
Every party has a favor for the guests, but I didn’t want to buy a bunch of random treats to send home with the kids. When I decided to do the obstacle course, I had the thought that it might be fun if I sent the kids home with the horses when we were done. Sticking with the My Little Pony theme, I made the stick horses to resemble Twilight Sparkle for the girls and Rainbow Dash for the boys. The total cost per horse was about $5 which really isn’t too terrible. I’ll show you how I made mine so that you can make some for yourself if you would like. Making these is very simple but will take about 45 minutes per horse.
Supplies needed:
- Wooden dowel
- Fabric (I made 3 horses using a yard of fabric)
- Black Felt
- Fabric Glue
- Yarn
- Ribbon
- Stuffing
- Styrofoam Ball
Begin by cutting out the parts of the horse. You are welcome to use the pattern I made by clicking the link at the bottom of the post. All patterns are for personal use only and are only available to those that subscribe to Just Between Friends. Once your pieces are all cut out, we will start with the two head pieces and the yarn. I measured about 30 inches of yarn and did that about 10 times for one bundle. Once you have a bundle of yarn, fold it over twice and then place it on the horse head going from the top of the head down to the neck. After I got about 6 bundles or so added to my horse, I placed the other piece of fabric for the head on top of the other and then pinned everything together making sure that the yarn is between the two pieces. I sewed them together leaving the bottom open since I needed to stuff the head still.
Turn the head right side out and then grab the ear pieces. You will sew two pieces together and then turn right side out. I found that the easiest way to turn them was to grab a dowel and push the end into the ear and then running the dowel along the edges of the ear inside to give it a nice clean look.

To attach the ears, I grabbed a needle and thread. I folded the bottom of the ear and then pinned it to the head so that there wasn’t a raw edge exposed. Then I did a simple whip stitch to attach it and then put an X in the middle of the ear to help tack it into place. If you don’t, the ears will be really floppy.
Now you will stuff the head with fluff. Start by stuffing the nose and then grab the styrofoam ball and dowel. Push the dowel into the styrofoam. This is going to make it so that the dowel doesn’t just pull right out. Be sure to hot glue the dowel into place. Then place the dowel, styrofoam first into the head and then stuff the stuffing in all around it. Once the head is stuffed, grab some yarn and a yarn needle and sew a running stitch around the bottom about 2 inches from the end of the fabric. Push the end of the fabric into the horse head and then pull the running stitch tight. Tie a secure knot and then push the ends of the yarn up into the horse as well.
With the head fully stuffed, you will add the eyelashes to the horse. I used fabric glue and it worked out great! The last step is to add ribbon to the horse around the nose as well as a longer piece for the kids to use as reigns. I simply sewed them together and then put them on the horse after.
The kids really LOVED the horses and they were even more thrilled to find out that they got to bring them home at the end of the party. I definitely got some cool mom points that day, which didn’t hurt. 🙂
Click the links below to download the FREE stick horse pattern. All printables and patterns are for personal use and only available to those SUBSCRIBED to Just Between Friends. SUBSCRIBE NOW to download.


Do you still have the pattern for these? I would love to make them for my daughter’s birthday party!
Sorry about the links not working for the pattern! The service I was using changed the way it was doing things and it messed all of the links up. I have updated with the correct links, so you should be able to access them now. Please let me know if you are still having troubles. Thanks!