


DIY Board and Batten Tutorial

When the school year ended last year, I told my husband that before school could start again in the fall, I wanted to have a command center built in our house to help us organize our lives. He kind of laughed at me, probably because I called it a command center, but then realized I was serious. It took us a couple of weekends to complete it all, but I am in LOVE with the way it all turned out. I am going to show you how we did what we did through several different posts in case you want to make it yourself sometime. Today I am going to start things off with how we did a DIY board and batten treatment using our existing baseboards, and how we made our giant magnetic chalkboard (which is my very favorite part of the whole thing.) Here is the before. A boring, plain hallway that served no purpose.

Supplies: (we purchased everything from Home Depot) This project cost us about $100 to complete
- 4ft X 3ft piece of aluminum sheeting- it has to be aluminum, NOT steel for it to be magnetic
- 1×3 MDF- Amount needed is based on the size of wall that you will be using. I will help you figure that out in a minute.
- 1X6 MDF- This is for around the chalkboard. You will need two 8 ft pieces for this project.
- Chalkboard spray paint
- Nail gun or hammer and nails
- Level
- White Paint
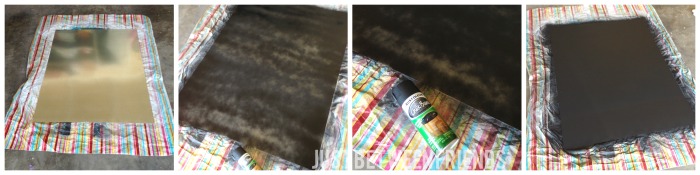
To begin, the metal sheeting needs to be painted. Using the spray paint, make sure you do 2-3 light and even coats of spray paint all over the metal. You don’t want puddles of paint.
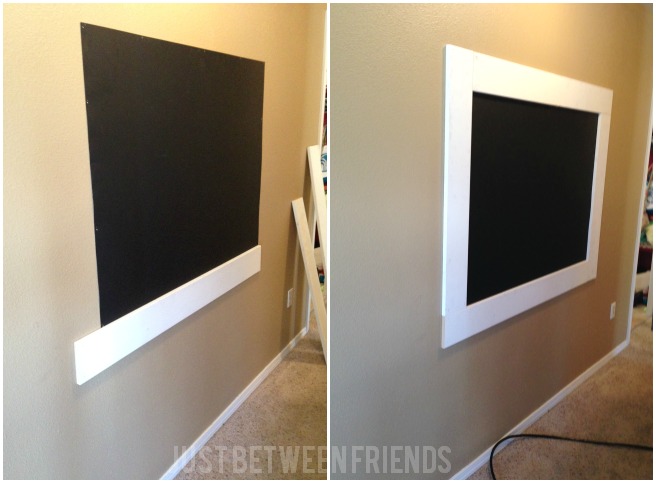
Once it is painted and dried, I wanted to attach the chalkboard to the wall very first so that I could get it exactly where I wanted it on the wall and then do the board and batten around it. I wanted the board to be low enough that my kids could reach it to color, but high enough that it was still at an adult eye level. Using the level and my nail gun, we attached the metal to the wall and then started constructing the frame around it. I decided that I would keep things very simple and left my frame pieces at a straight cut instead of an angled cut. We built the frame and just nailed it into place making sure to overlap the metal edge by about a half an inch on all sides so that we didn’t have any exposed edges.

One the magnet board is in place, I added the horizontal boards to the walls. I put them on the wall at 3 ft from the floor. Make sure to use the level through this whole process. There is nothing worse than a crooked board and batten!

Now that all of the horizontal boards were in place, I decided to paint the wall. It is much harder to paint AFTER you have the vertical boards in place. I recommend doing two good coats of paint before adding anything else.
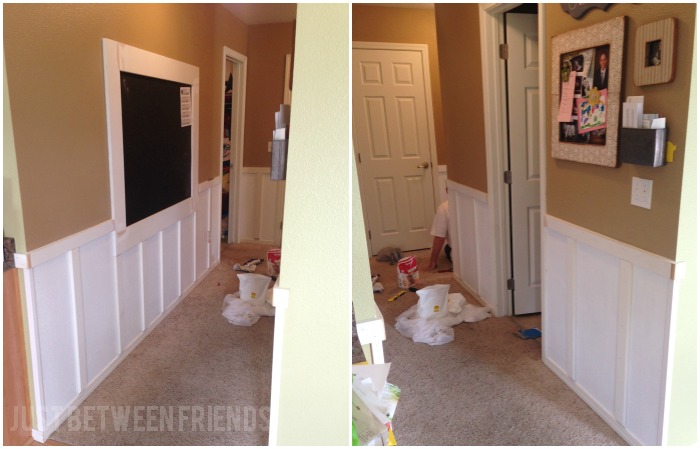
The vertical boards definitely take a lot more time. I measured from my baseboard to the vertical board to find out how tall the boards needed to be. They were all the same EXCEPT for the ones underneath the chalkboard since the frame goes lower than the vertical board. (make sense?) Once I had them long enough, I cut the bottom at a 45 degree angle so that it angled down into my baseboards. If I wouldn’t have done that, it would have stuck out from the baseboard in a weird way and looked awful. This made it so that I could keep my baseboards and still have the look of board and batten. It definitely cuts down on the cost of the overall project to not have to worry about replacing them. When you are adding the vertical boards, it is very important that you use a level for every single one of them. I spaced the boards at 15 inches apart from each other, making a small adjustment underneath the chalkboard so that I could have the boards match up with the ends of the frame and still look even. After you get all of the boards onto the wall, it is time to sand, caulk, and fill all of the nail holes to get a nice smooth finish. This is the part that takes FOR-E-VER, but is the most important. It makes a huge different in the way it all looks for sure!
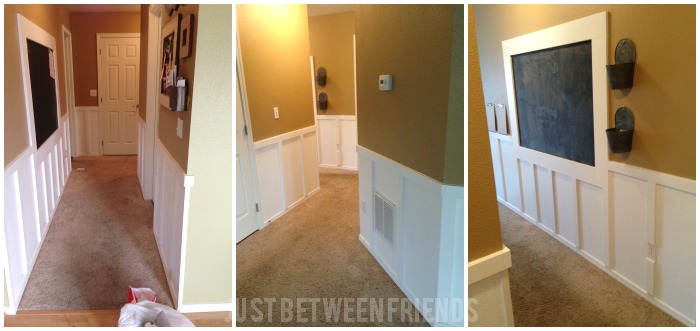
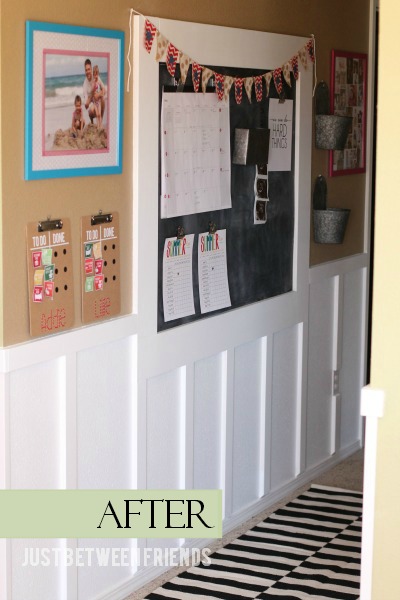
2-3 coats of paint later, and you are done! Stand back and pat yourself on the back for a job very well done! Like I mentioned at the beginning of the post, I wanted this area to be one that is multi-functional and helps us stay organized. You can see in the picture above how I started adding things to my command center, and if you want a real peak at what the after looks like, take a look at the picture below. I have so many things to show you that I am SURE you are going to love. I know I do! I walk down that hallway everyday and can’t help but smile with the way it all looks now. The colors and the organization just sing to me. 🙂 I will be back tomorrow with another tutorial that is probably my second favorite from this whole project. Be sure to check back!

One thought on “DIY Board and Batten Tutorial”