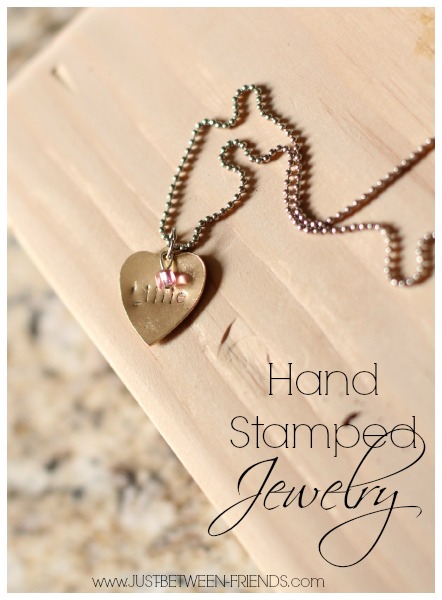
Hand stamped Jewelry | Personalized Necklace
Making jewelry has always been something that I have been fond of. Ever since I remember, I was making beaded and knotted bracelets, earrings, and pretty much anything that I could get my hands on! I used to have a fishing tackle box filled with nothing but jewelry supplies. One thing that I have always loved is personalized jewelry, and making hand stamped jewelry is the perfect way to add personalization without breaking the bank! For Valentines Day, I decided I would make Lillie a quick little necklace and show you how you can make one too since it doesn’t have to be given only on a holiday.
Supplies:
- Metal Stamping Kits– You can find a ton of different options on Amazon. That link will take you to a full list. I like having an uppercase set and a lowercase set to play with, but it is up to you.
- Metal shape- I found these cute gold hearts at Hobby Lobby in the jewelry section
- Necklace chain
- Coordinating bead (optional)
This is all pretty self explanatory, but I will go over it just in case you have any questions. Begin with a hard surface. I used a piece of granite and then put a piece of scrap wood on top of it. This makes it so that you can hammer the metal without causing damage to whatever surface you are using. Pull out the letters that you will be using and then, using a hammer, firmly tap the top of the stamp once you have it in place. You shouldn’t hit more than 2-3 times because you will end up with a double letter and you don’t want that. Continue this process until you have the full name in place. Once the name is on the heart, you will use a sharpie marker and trace the letters. Then take a baby wipe and wipe over the top of the letters which will remove excess sharpie but make it so that the letters stand out much better.
I wanted to add a pop of color onto the necklace, so I took a simple pink bead and put it on a metal pin (found in the jewelry aisle at Hobby Lobby or any craft store that sells jewelry supplies) I cut the pin to the right size and bent the top to create a loop. Then I used a jump ring (also found in the jewelry supply aisle) to connect both the heart and the bead together. Now you just need to put the heart on the necklace chain and you are finished!
It is the perfect necklace for my daughter because it wasn’t too expensive to create, and can be easily replaced if lost. Plus I had fun making it! I hope you’ll use this tutorial and make some fun jewelry for your girls or for anyone that would enjoy a personalized piece of jewelry!


WANT!!! Could you do one just like that, that said MACEY?? I’d love for you to send me a quote. I own none of those things but my little girl has been asking and asking for a heart shaped necklace. You should email me 🙂
It’s perfect BTW and I’m sure your little lady is loving it!
It’s beautiful! I bet she just loves it! I have a hand stamped post coming up in a few weeks. 🙂
I want a metal stamping kit bad! I need to remember next time someone wants me to give them a gift idea!
So darling! My daughter would love this too!
I had actually seen a similar tutorial a couple years ago. I had bought myself some metal stamps at a local Harbor freight. Only thing is It didn’t work for me. Not sure what I was doing wrong