A Work in Progress {Built in Bookshelves}
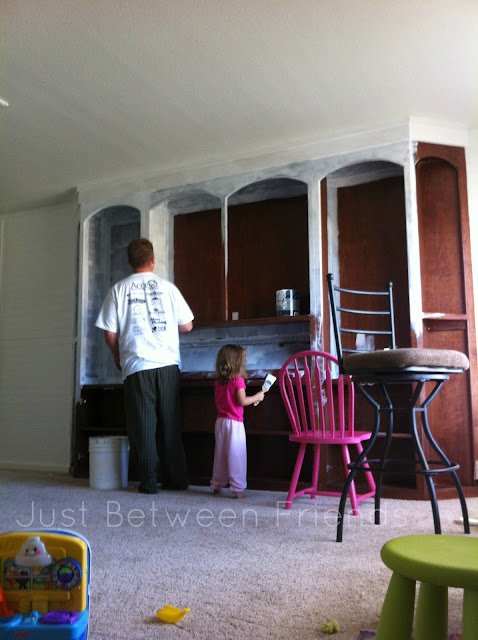
My husband and I have been working on this project for a very long time now. I’m talking over a month! It is the project that never ends. At least it feels like it. I wanted to show you where we came from, and where it is now. I will update you as we update the room that way you can see the process.
We began with a set of bookshelves that my in laws had removed from their house and gave to us. (Lucky us!) I knew that with a little TLC that we could make it look like something that we love, and guess what. I was right!
The first step was bringing the bookshelf into the house and putting the different pieces where we wanted them. As you can see, the bookshelf is in pieces. I told John which piece and wanted and where. Then he centered them on the wall and attached them using screws into wall studs. It was a big task. Once it was in place, we lightly sanded the whole thing.
This is where John and I got frustrated with things. We wanted to add crown molding to the top, but then came the task of figuring out angles and doing math. Let’s just say that there was a lot of thinking going on. We would measure and re-measure before making cuts and it would still end up being wrong. Ugh. The angles on the bookshelf were just really difficult for us to work with I guess. We got it in the end, so there’s a pat on the back for us. The reason for telling that story is to tell you why I didn’t take as many photos as I should have. When you work on something for a full day that should only take you an hour to do, it’s a little frustrating.
Now to give you the run down of what I did to everything. I added beadboard to the walls on either side of the bookshelf. I LOVE the way it looks. I decided to use the beadboard so that the lines were going horizontal instead of the traditional vertical. We framed it out with some trim pieces, and even added new baseboards. I did all of the attaching with a nail gun and it worked great.
We also added trim to the whole wall by the ceiling. I LOVE this too! It really gave the look of a built in. If we ever decide to move, this will be something that will raise the value of our house. It definitely makes a statement. Once it was all added, I caulked and filled every nail hole and crack. This makes the painting go much smoother.
The next part was the most tedious. Painting. Ugh again. We added seven (SEVEN) coats of white paint to get complete coverage. Did I mention that it took us over a month to complete? Ya. This is what took up the whole time. In the end, it is totally worth it because it really brightens up the room, updates the bookshelves, and brings a great new look to our upstairs loft.
I had a little problem that I had to solve. It included the back part of the bookshelf. My inlaws had light switches in the back of some of the bookcases. This was great for them, but we didn’t have light switches there. The problem: there were holes in the back of the bookcase. I used foam core and fabric from Hobby Lobby to create panels that fit exactly behind the shelves. Problem solved! Well, almost. I bought four yards of fabric initially thinking it would be enough. It covered everything BUT the middle section.


Oh wow, looks like a ton of work–but it looks amazing!
Beautiful! Like always!