


Decoupaged Backsplash Tutorial
Wow! What a response! I am so glad that you all liked my backsplash and am so excited to show you how to do it to your own kitchen. I would have written up this tutorial sooner, but I have been working hard on my project for the third round of Crafting with the Stars and literally haven’t had a moment to myself.
Let’s get started. These are the supplies you will need.
-scrapbook paper
-art tape (you can find this at your local office supply store. It is a thin black tape that I used for the grout lines.) Make sure to get the 1/8 inch size
-mod podge (matte finish)
-scissors/rotary cutter
-sponge brush
To start out, I looked online for backsplash patterns that I liked as well as colors that i thought would be good together in my kitchen. I then sketched it out so that I knew what I wanted. I also measured out how big the spot above my stove was so that I could draw out the exact pattern I wanted and the tiles that I would need to have to complete it.
Next, I cut out all of the tiles. Behind the stove, the cream tiles were 2X4 inches, the gray tiles were 2X2 inches and the red tiles were 4X4 inches. The tiles above the counter were just the standard 12X12 scrapbook paper size.
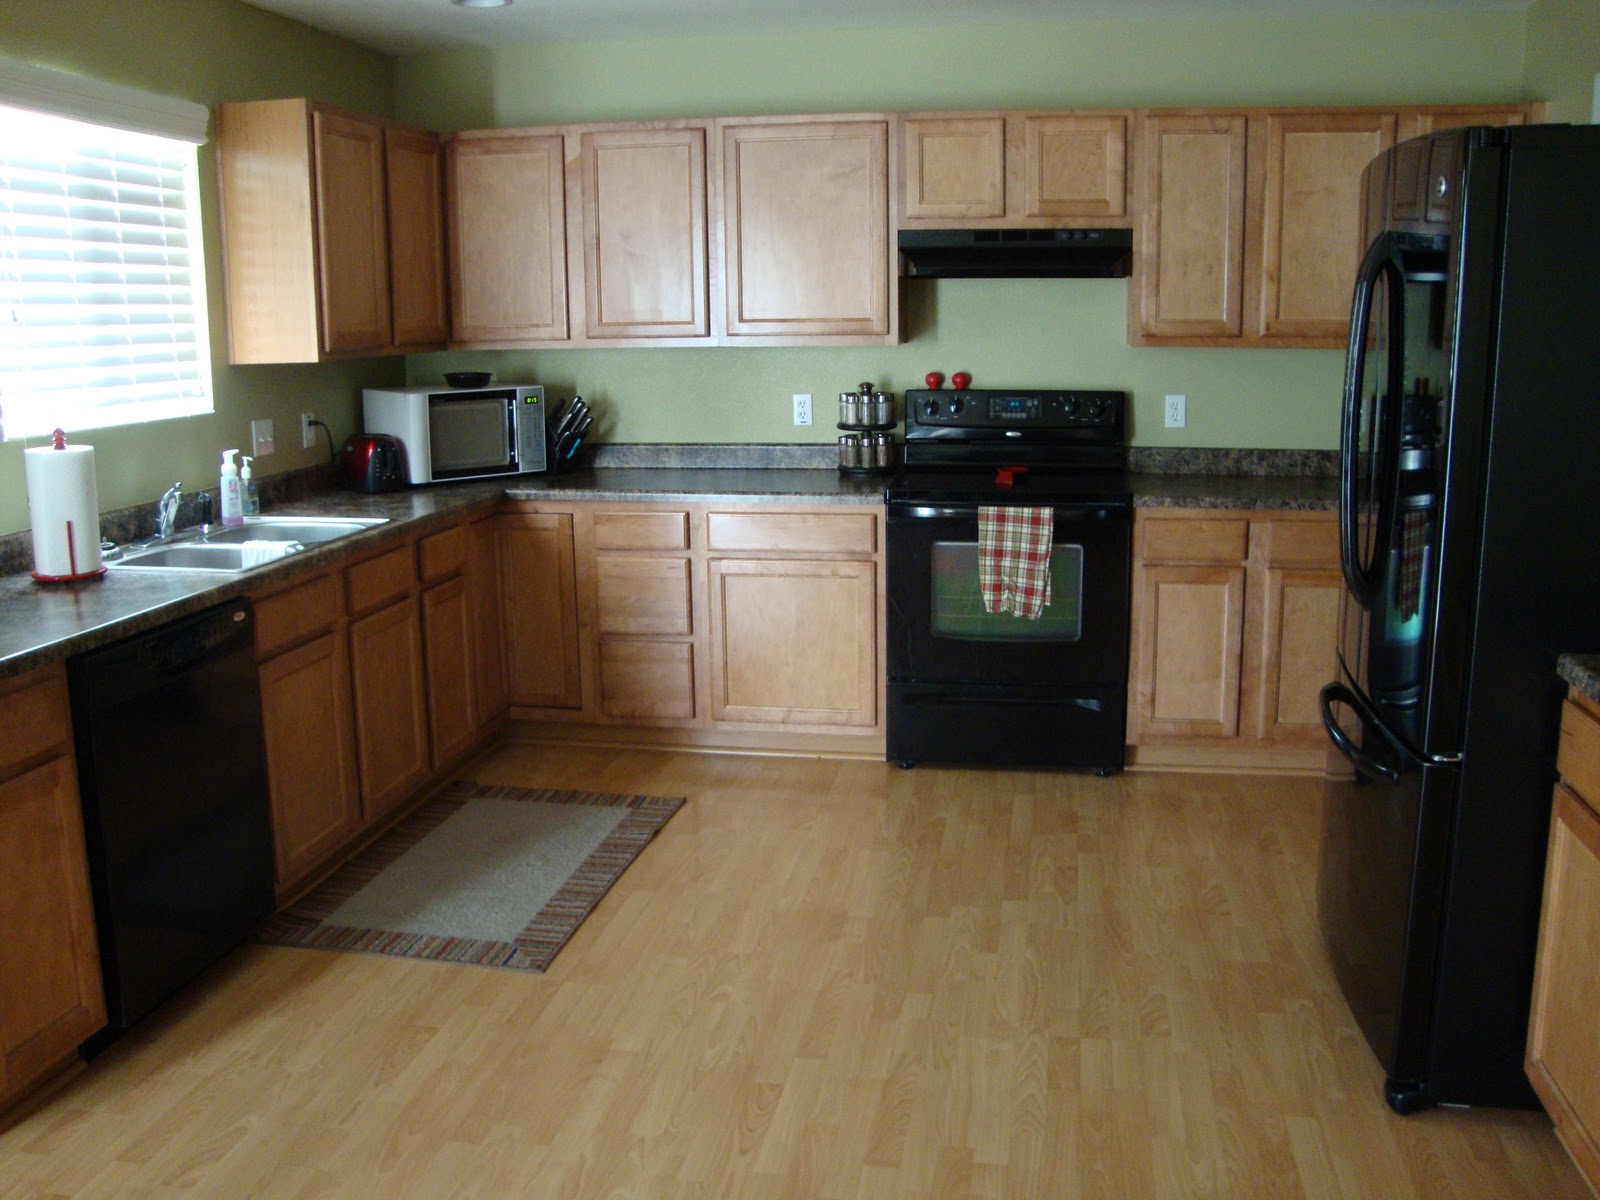
Here is the before:
Just a plain old painted wall. Nothing special and pretty boring.
The next step is to cut out your tiles and arrange them the way you want them.
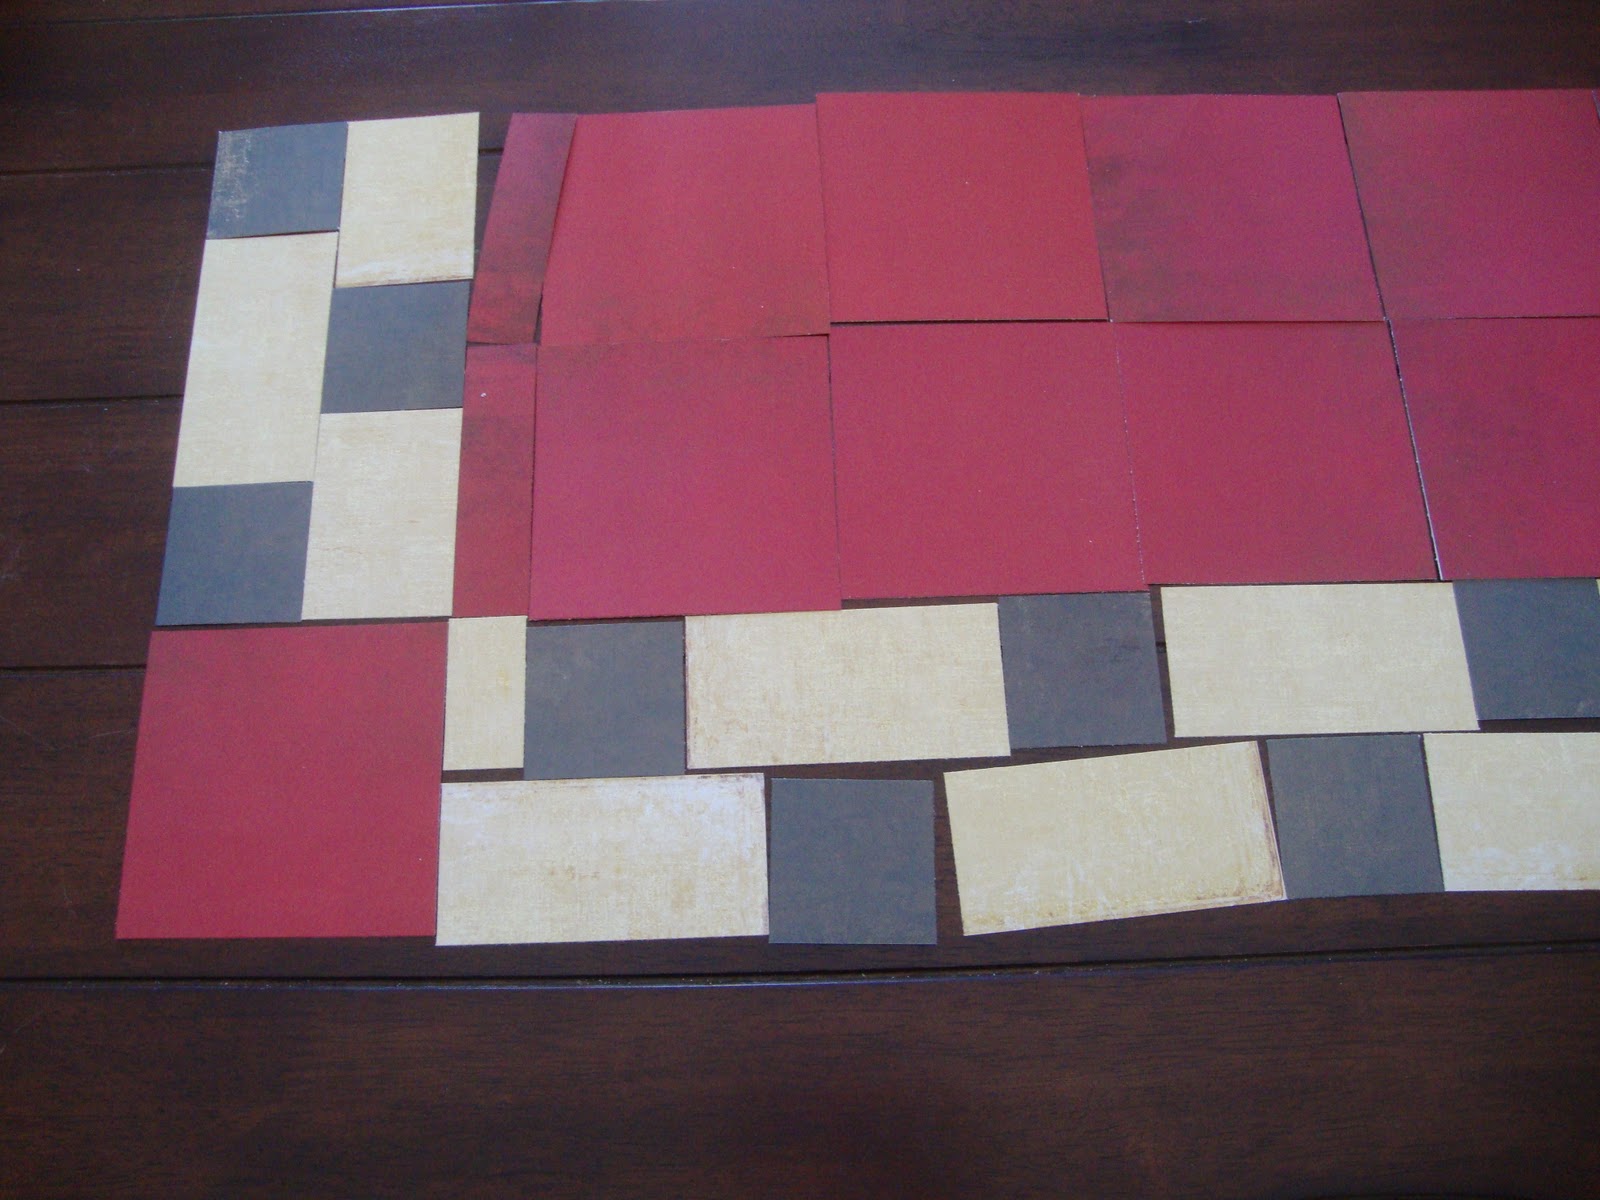
This made it really easy for the application process. I just went in rows starting at the top and worked my way to the bottom. I found the best way to attach was to put mod podge both on the wall and the paper. It made it so that every part of the paper was sealed to the wall.
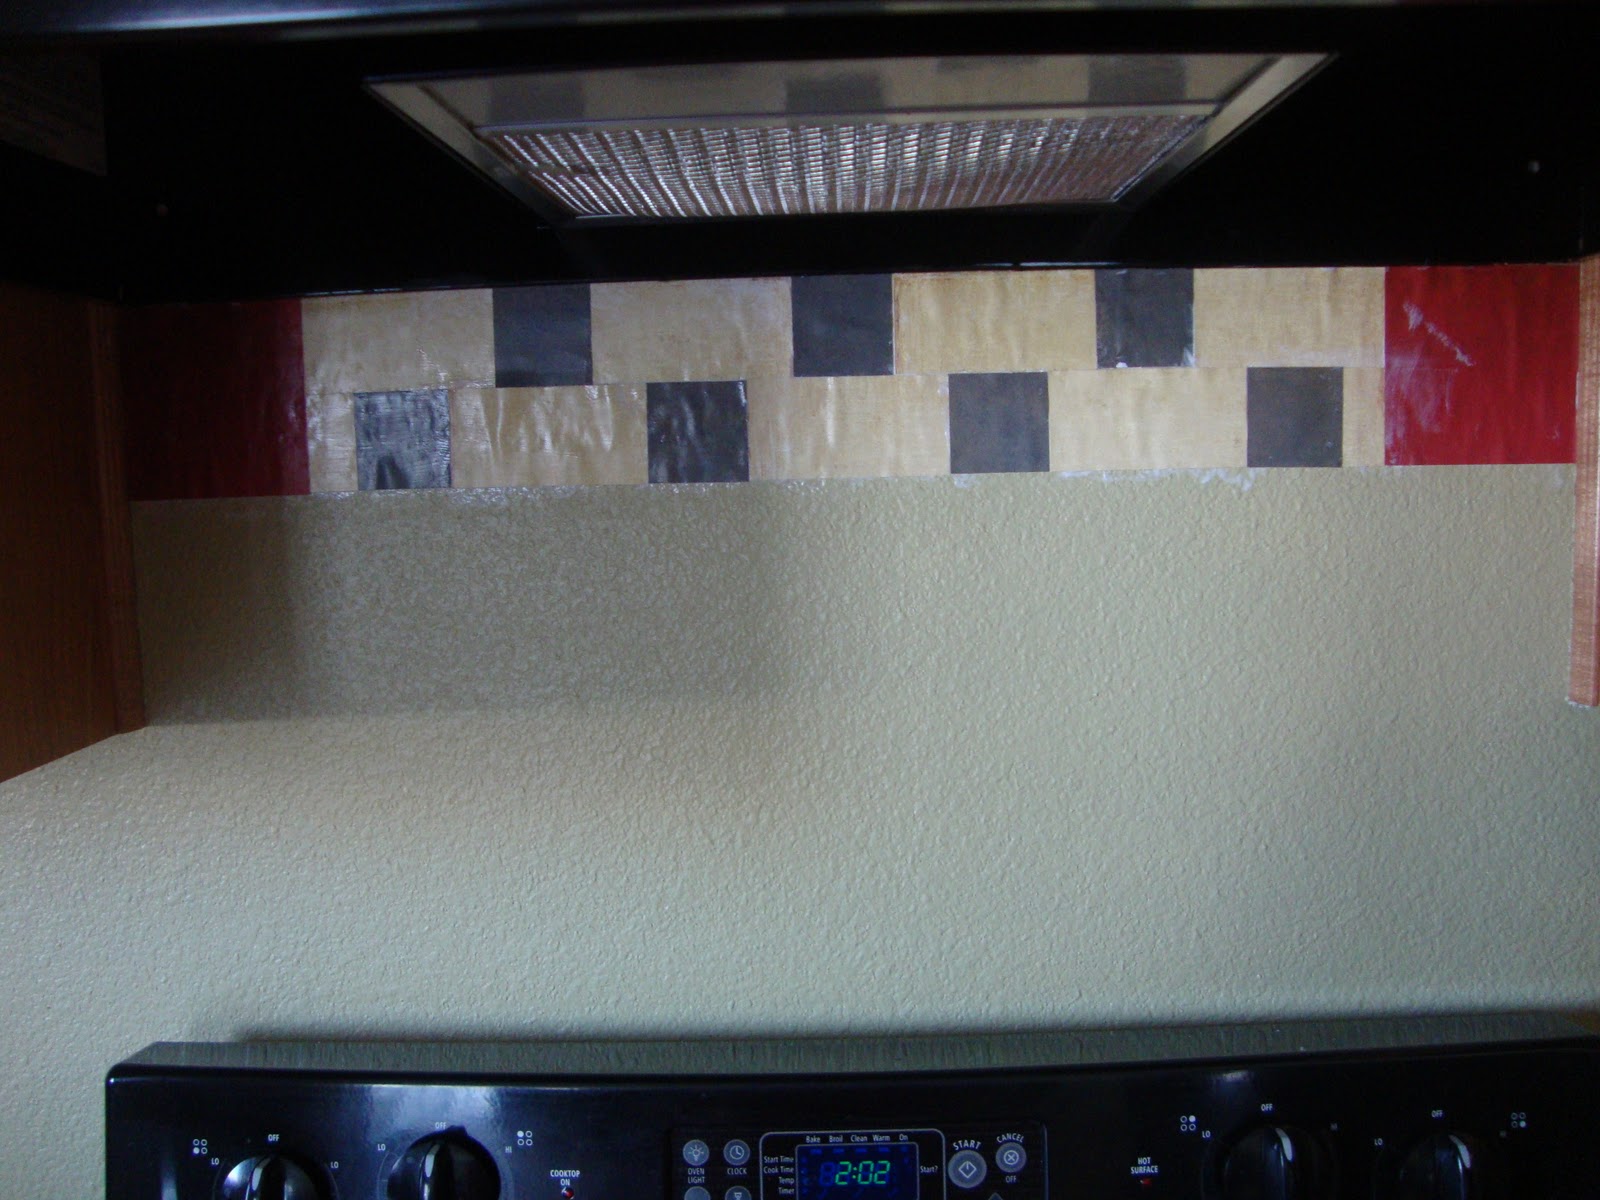
After the part above the stove was finished, I did above the counter tops. To get the tiles to be perfectly diagonal, simply cut one paper in half diagonally and attach to the wall. Once the bottom tiles are in place, the second row should fall into place perfectly.

My tiles were a little too big to fit exactly, so I had to cut the top off of them. The easiest way to get it just the right size is to fold it over and then cut along the crease that you made.
Once all of your tiles are in place, put the art tape along all of the edges to make it look like the grout between tiles.
Add a layer of mod podge over the top to help completely seal the tape and paper. Let it dry and later go back and use a varnish of some sort. (I’ll let you know when I do it to mine which kind I used)
Now, take a step back and enjoy!
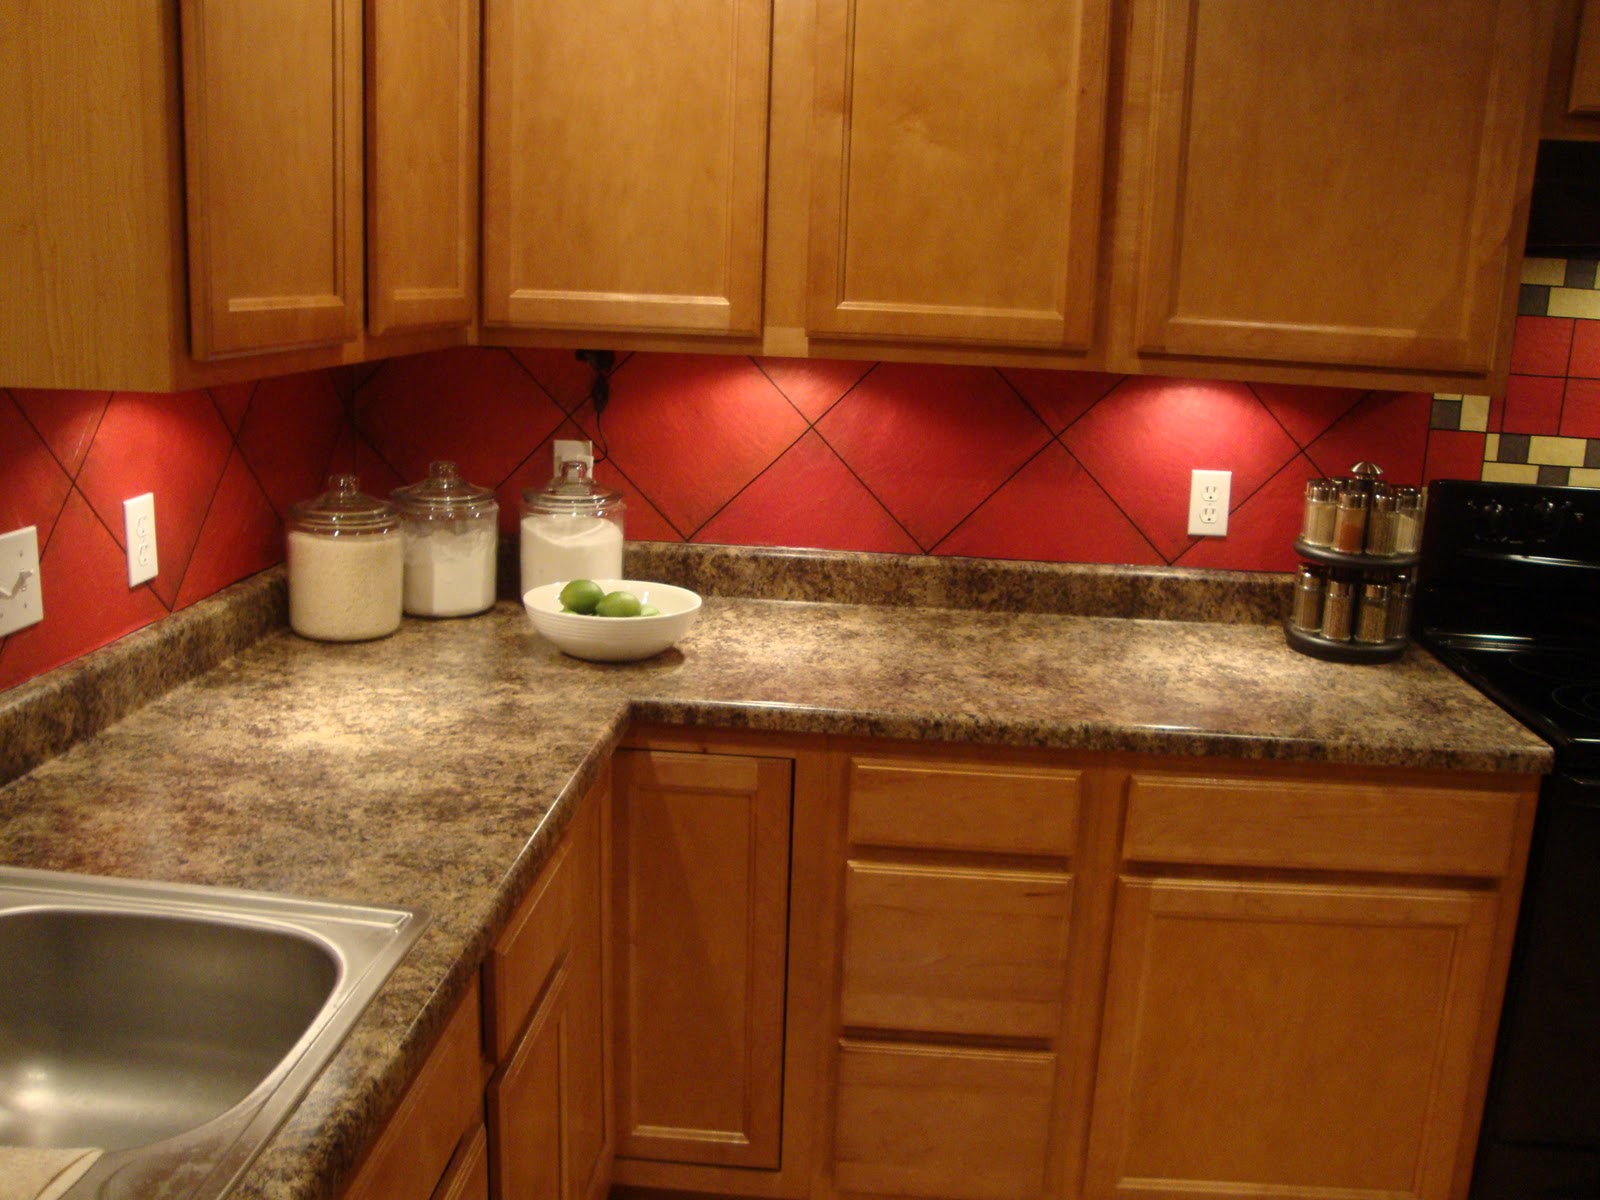
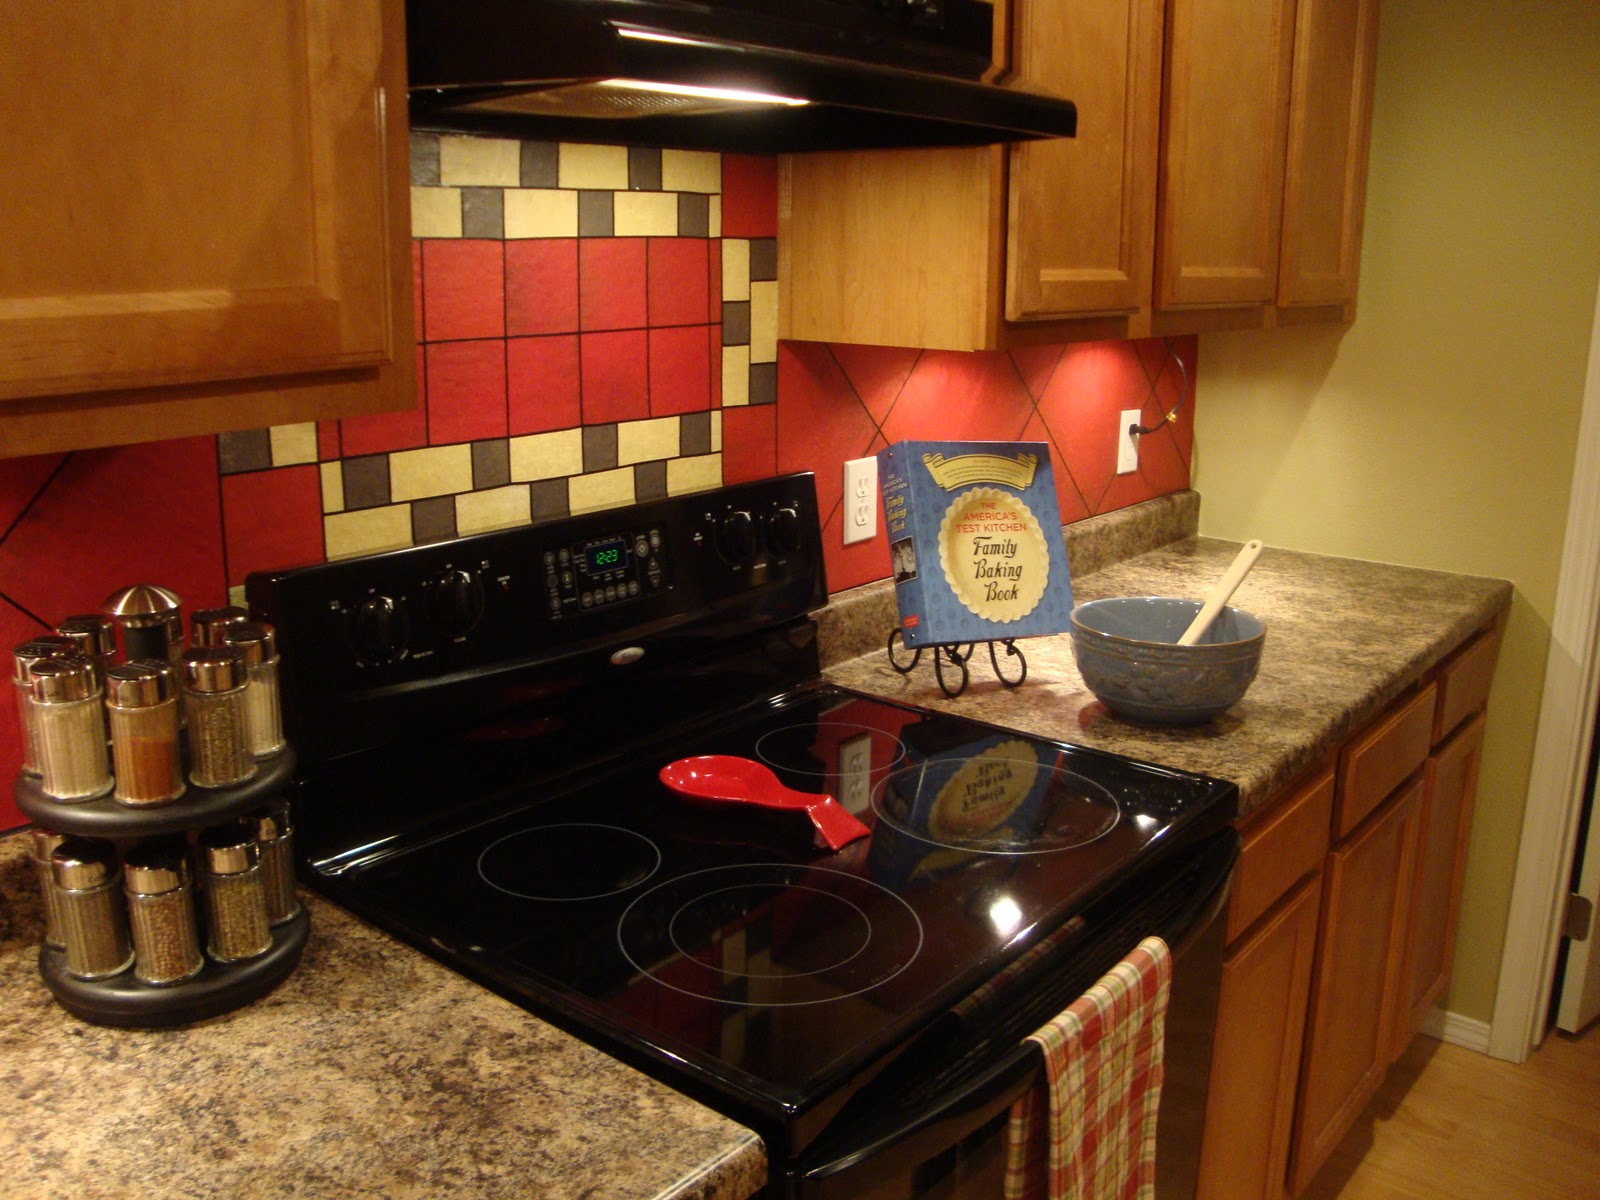
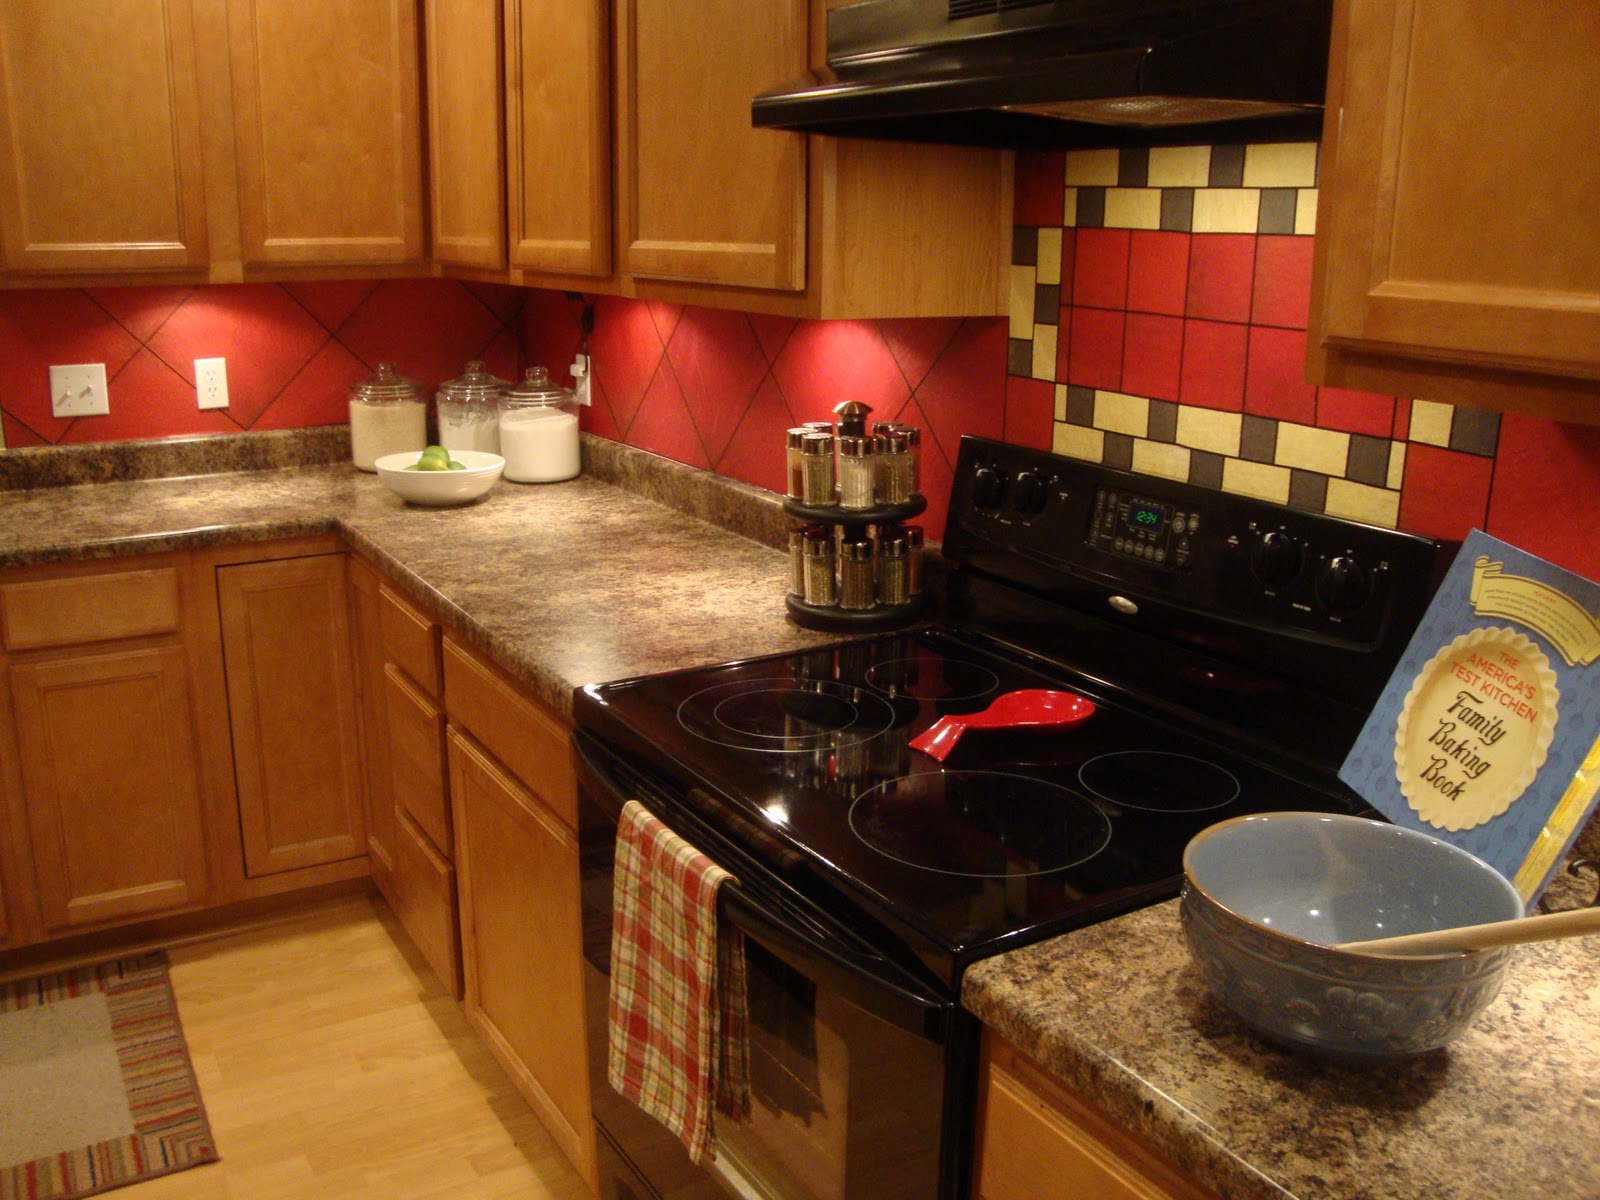
It is an inexpensive and stylish way to add a backsplash. I also added lights under my cabinets. I didn’t realize how big of a difference having light on my counter makes. I love the way it turned out.

Good luck! Let me know if you have any other questions. I would be more than happy to help in any way that I can.
If you decide to do this in your own home, I would love to see it!! Send pictures to:
Don’t forget to enter the Lizard King giveaway! It closes tomorrow at 8 pm.
Also, don’t forget to go vote for your favorite project!

(Visited 1,188 times, 1 visits today)

Hi there! I’m a new blog follower via Google Friend Connect. I love your blog! Hope you’ll check out my blog and follow back! Have a fabulous day and blog on!
-Ashley
The Broke Bride Chronicles
This is so clever! I am going to share this with my sister. I just started following your blog. I look forward to seeing all your great ideas!
Wow, this is totally creative! Great job, and thanks so much for sharing!!
This is very creative! I would love for you to link up to my Ten Buck Tuesday link parties!
http://www.youngnester.blogspot.com
So awesome! We’ve awarded you a stylish blogger award. Come get the button if you like 🙂
Super cool! You did it so precisely, I’m very impressed!
Amazing! I’m also impressed!
Wow! This is just amazing I LOVE how it turned out. Thanks for sharing!
Melanie
youmadethat.blogspot.com
WOW! That is so awesome!! Did the Modge Podge make it bubble? LOVE it!!!
Thanks!
Amy
I’d appreciate it if you would come enter my giveaway today!
WOW!
What a beautiful job!
Will MODGE PODGE withstand any water or food splashes? I would hate to do all that work, then it get messed up!
Would love it if you would update with the type of Varnish or sealer you use to finish this totally. It looks awesome and I want to do it!!
This is awesome! I am featuring this at somedaycrafts.blogspot.com.
WOW! What a different 7 creative idea – Love it… will be keeping this in mind for my own ‘on a budget’kitchen makeover. Thanks for sharing the how to.
Cheers
The Spangler @
The Quick Unpick
This is amazing. The lights just make it even better. What kind of lights did you use? Can you decoupage tile….heading down to look at the kitchen now. ~Kelly
unDeniably Domestic
This looks great! My concern is splashing from the sink, b/c Mod Podge isn’t waterproof, right? I can get sloppy when I’m doing dishes.
My mind = blown.
This looks amazing. I never would have thought of doing something like this.
I absolutely love this! Looks FANtastic. I have just spent the last few days looking for creative backsplash ideas (and thrifty too) with paint…however, I may have to use the scrapbook paper.
Love it!
~Pam
pamspaintparlor.typepad.com
Helby-
Since I’m sure she’s incredibly busy, I’ll just add that there is an “Outdoor Mod Podge” product now that is water resistant. Mod Podge is a glue and sealant all in one, and I’ve gotten things “wet” (and just wiped off) that I’ve used it on without a problem. But I think because it’s in a place used a lot and near splatters, I’m guessing that’s why she intends to add a topcoat of some kind.
If it was me (because I wouldn’t want the paper to “yellow” as it might with an oil based product) I’d probably use a good “outdoor” water-based urethane product. The kind you could use on decks or furniture. I’d do a couple of coats and sand VERY lightly between coats to keep it smooth.
FABULOUS idea and tutorial!
This is awesome.
Just this weekend we had been to our local hardware store and they had some cool looking plastic backsplash (that looked like copper or metal) that came in sheets 18″ X 24 for $21.99 ea. I loved the look and decided I would really like to put up something all around the kitchen but that would cost a small fortune.
I knew I could come up with a good DIY idea…and this post has really given me a lot of inspiration!
It looks Great!
I love your backsplash,, thanks for sharing how you did it.