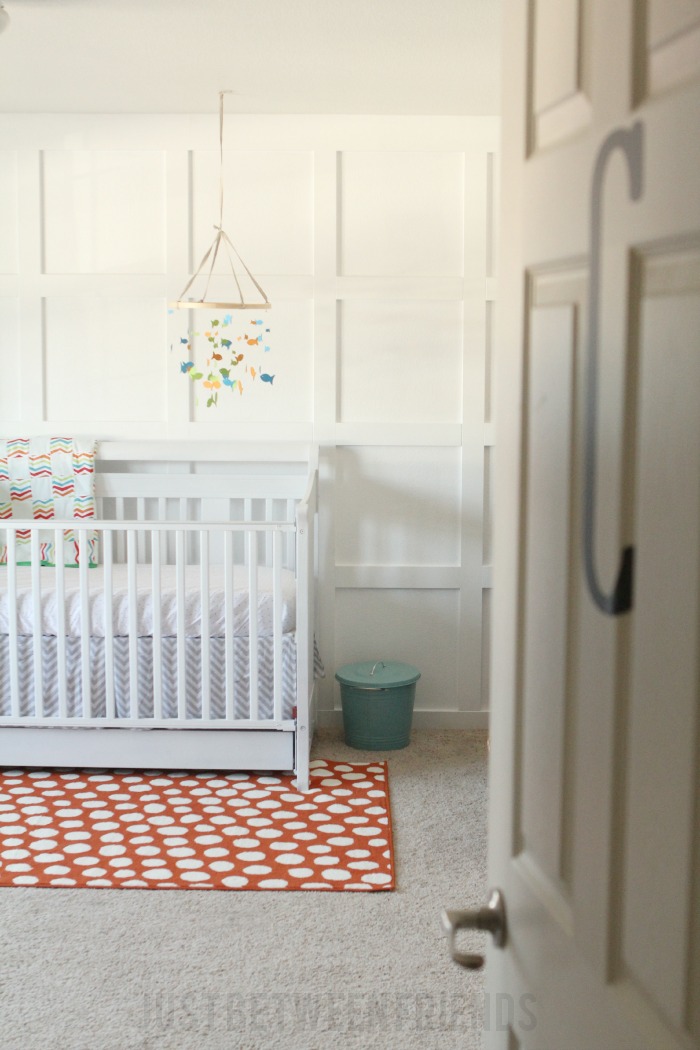
Board & Batten Squares
When I originally proposed this idea to my husband, he was hesitant. He thought we should just do the standard 3/4 wall vertical board and batten treatment. Now that this is done though, he agrees that it was definitely the way to go! I knew that I wanted a simple white board and batten treatment behind the crib, and this really is what makes the room look finished and might be my favorite part! I will show you the basic overview of how we got the wall done in case you wanted to ever do it yourself. It is a ton of work doing the board & batten squares, but the end result is amazing! (PS how do you like the sneak peak of the nursery up there?) 🙂
Here is where we started off. It is just a big empty room with dirty white paint. Whoever decided on the white that should be used when our house was made really had no clue. It just looks dingy. I knew it needed a nice fresh coat of pure white paint, but decided that I didn’t need to paint until after the boards were up. If you are starting with a wall that is any color other than white, I would definitely recommend painting it white first. It will save you so much time in the end!
We started by framing out the wall with our MDF. The sides and bottom all got 1X4 MDF and the top got 1X6 to make it look more like molding at the top. To attach the boards, we used a nail gun with 2″ nails.
After it was framed out, we started adding the vertical boards. This is where you will need to do some math. I took the length of the wall and divided it by the amount of vertical boards that I wanted to put up which told me how far apart the boards needed to be placed. Mine ended up needing to be placed every 19.5 inches or so.
Now that the vertical boards were up, I added the horizontal boards. I figured I would only need 3 boards placed which would give me 4 squares total per section. When you are putting the boards up, it is so important that you use a level on every single board that you use. If you don’t, it will look really bad. 🙂
Once the boards were all up, I caulked all of the seams and filled all the nail holes. This is the part that took FOREVER! I wanted it to look the best that it could, so I really took my time making sure there weren’t any globs and then sanded down the boards to make sure that they were all smooth and ready for paint.
The last step was using a paint brush to paint along all of the edges and then using a roller to paint the rest. It gave it the smooth perfect finish that I was hoping for. There is such a difference in the pure white I used. It really made the room bright and fresh! I also painted the other walls a soft grey color and I love the way it turned out as well. It was a Behr paint called sandstone in case you are wondering.
In the end, it really was worth all of the extra work. I love the custom look it gives to the room, and I LOVE the way the white just brightens the whole space. If you have considered giving this a try, I highly recommend it!


I LOVE it!! Seriously, this is something I really want to do now (Nate’s gonna hate you 🙂 Can’t wait to see the whole reveal!
I love this! We did a treatment on my daughter’s walls too and I love it. We are going to start painted her room and changing things up a bit. It is so much fun doing kids rooms!
Are your walls textured? I’m wanting to this but, but husband is hesitant because he doesn’t want to have to deal with what to do with the textured walls in between squares.
Love this!! It looks fantastic!! My husband is afraid I will tire of the look. How long have you had it up? I can’t imagine I would tire of it!!
Thank you for the feedback!! I agree!! Very classic look that will not go out of style!! I will be having further conversations with my husband about this. We are building and would love to have this done on one wall in our master bedroom. Thanks again!!
What did you do about nailing into studs? at 19.5″ apart, you can’t be hitting studs with your nails… I’ve scoured the web looking for the answer. I know you can glue the boards, but everyone always talks about filling the nail holes taking so long, I’m wondering if there’s a secret to nailing when there are no studs to hit?
Your nursery looks great! What are the dimensions of the wood panels that you used and where did you purchase them from? Thanks.